


Hx711 Proteus Library Jun 2026
High-bit ADCs like the HX711 require precise clocking; simulation speed may need adjustment if data "jitter" occurs. 6. Conclusion
After writing your code, it must be compiled into a .HEX file. In the Arduino IDE, you can achieve this by navigating to . The output .HEX file is typically located in your sketch's folder. In Proteus, you load this file by double-clicking the microcontroller component and browsing to its location.
⚠️ Proteus does not include an HX711 model by default. You must download or create a library. hx711 proteus library
Search for and select an model (or your preferred microcontroller).
Ensure your potentiometer is wired correctly to generate a true differential voltage across A+ and A- . If the voltages on both pins remain completely identical, the ADC output will register as static or zero noise. High-bit ADCs like the HX711 require precise clocking;
Have you successfully used the HX711 library in Proteus? Share your experience in the comments below. If you faced any errors, feel free to describe them – the community grows when we help each other.
Simulation Tip: Because standard load cells generate mechanical strain, the Proteus load cell simulation model typically includes a toggle button or a potentiometer. Adjusting this potentiometer during emulation simulates adding or removing physical weight. Writing the Arduino Simulation Code In the Arduino IDE, you can achieve this by navigating to
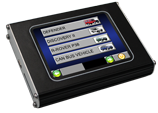
An Arduino UNO or ESP32 model receives the digital data for processing and display. Seeed Studio 3. Library Integration Methodology